Designing For Title
Peachy Keen Stamps Alumni

I've Been Published!

Scrappin' Navy Wife
Copyright
Copyright Information All content included on my site is copyrighted Emma v. Aguilar. My projects & photos are shared for your personal inspiration & enjoyment only & may not be used for publication, submissions or design contests. So please don't claim my work as your own. Thank you.

Wednesday, March 6, 2013

3-D Wednesday


Good morning my creative friends & welcome to another 3-D Wednesday! For today, I made 2 projects for you ;)  The first one is a cute tag for a friend. I thought it would be cute to use my cute little girl from my "Fly Away with me" stamp set & make her look like she is holding a 4 leaf clover shaped balloon! I just LOVE that sentiment from "I Believe in Leprechans"!

Supplies used for tag:
~ You're my pot of gold (will be back in stock on March 10th)
~ Stitched Doily Die (will be back in stock on March 10th)
~ Stitched Button Dies (will be back in stock on March 10th)
********************************************
Okay, now onto a cute little gift I made for my boys' teachers! 

 You can see in my video below how I made these cute jumbo paper clips/book marks!


Here is a close up of it!

Supplies used for teacher gift:
~ Treat Slider Box (will be back in stock on March 8th)
~ Stitched Ticket Dies (will be back in stock on March 8th)
~ You're my pot of gold (will be back in stock on March 10th)
~ Lace Ribbon also from Liz's paper loft boutique

Here is my video for you today! :)

Now onto my FABULOUS design team! Don't forget to visit each of their blogs to leave them some love! ;)


I hope you were ALL inspired to go make a 3-D project today!
Thank you so very much for stopping by & I will see you all back here tomorrow for another AMAZING challange from my DT Miss Cathryn! ;)
Have a fABULOUS day! xoxo


Thursday, January 17, 2013

Non-Tradional Color Valentine Cards

 GOOD AFTERNOON my creative friends!  I hope you ALL have been doing good! Me, keeping busy but still not 100% so I've been trying to keep a low key so I can be ready for one ALL those dies to arrive (which are on their way to me as I type)! YEP, I am going to need ALLLL my strength to help get everything packed up & sent out to ALL of you who have been waiting so patiently for your backorders!;) 
Okay, I have an EXTRA SPECIAL card for you today along w/2 that I have made too! Today I wanted to feature some Non-traditional Valentine color cards for you! This FIRST card is one made by MY MOTHER!:)  I think she did an EXCELLENT job! She used the heart dies from "100% Sweetness" & the sentiment is from "Lots of Love"!;) I think it looks pretty for "non-traditional" Valentine colors!
 I made this next "non-traditional" Valentine Color card, I used paper from Teresa Collins "Vintage Finds" 6x6 paper pad. All I did was add some red to it & made it some what a Valentine card! The sentiment is from "Fly Away w/me Sentiments" !
 
 The dies & stamps I used are "Fly Away w/me Dies" & "Fly Away w/me Stamp set".  I adhered it all done using lots of pop dots!;)  Then I added the little "Stitched Layering Hearts" & added them to the banner! Lastly I used my FAVORITE Red thin hemp.
 Here you can see the chunky glitter I put on the hearts & on the clouds!;) I REALLY like how it came out!
Okay, now this next card here, I decided to do a 2-part video! I thought it would be fun to make 2 cards using the same paper pad! It is Echo Parks "For the Record II" and I also used the coordinating brads to go w/it! Since this is a NON Valentine paper pad, I wanted to challenge myself to make one "regular" card & a Valentine card using this same pad! This first I thought was a simple & fun one!
 I just LOVE this paper pad because it does have a vintage feel to it & it's PERFECT for a "manly man" card.:)  I think this card will even work for a female too, heck I would LOVE to receive a card like this too!;) 
As soon as I saw this paper I knew I wanted to use my CUTE "Circle font" stamp set! I stamped the letter dies onto the circle dies that are included in the "Build a Banner set"! Aren't they so PERFECT for this paper? You can see in my video below on how I put this card together.

I hope you enjoyed the 1st card of my 2 part video! Tomorrow I will make a Valentine card using this same paper!:)  Thank you so much for visiting my blog today & I will see you all back here tomorrow! Have a FABULOUS day my sweet friends!:) xoxo

Thursday, November 8, 2012

Designer's Challenge ~Miss Rosy


Fabric and Stitches- Giftcard Tag for the Holidays

Sweet Thursday Morning All! Welcome back for another Designer Challenge, with Rosy from Sweet Delights Paper and More. For this Challenge, I want to incorporate Fabric and Stitches to our Projects. Any type of project goes. Meaning, you are welcome to create a Card, Layout, Home Decor, or 3-D Project. As long as you are using MY CREATIVE TIME PRODUCTS as well.


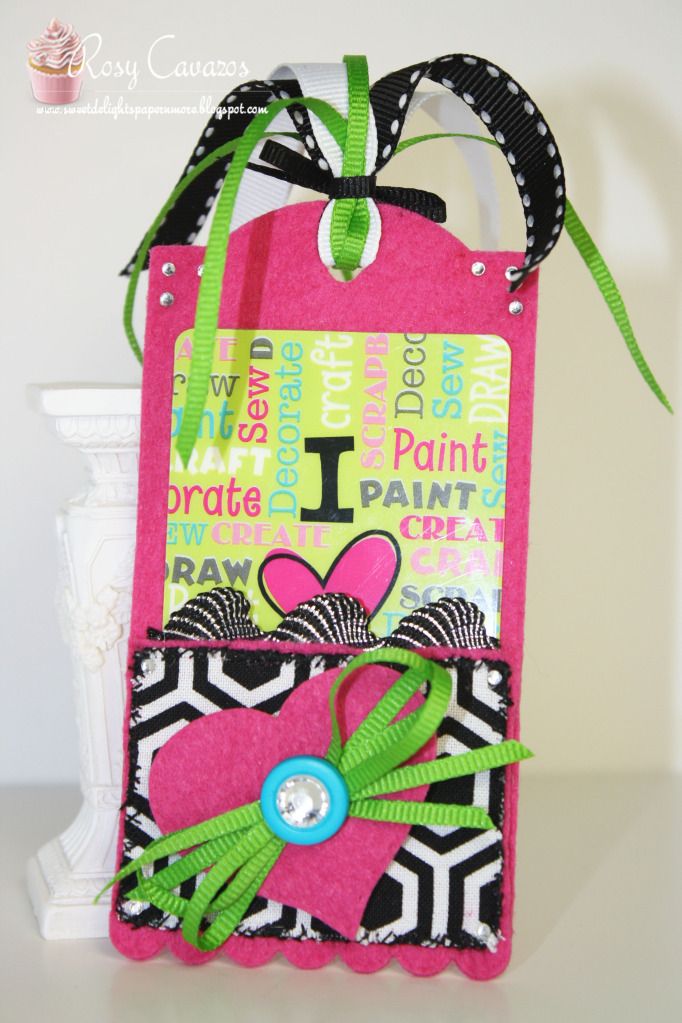
 Here are some pics of My Project, which I created for this Designer Challenge:
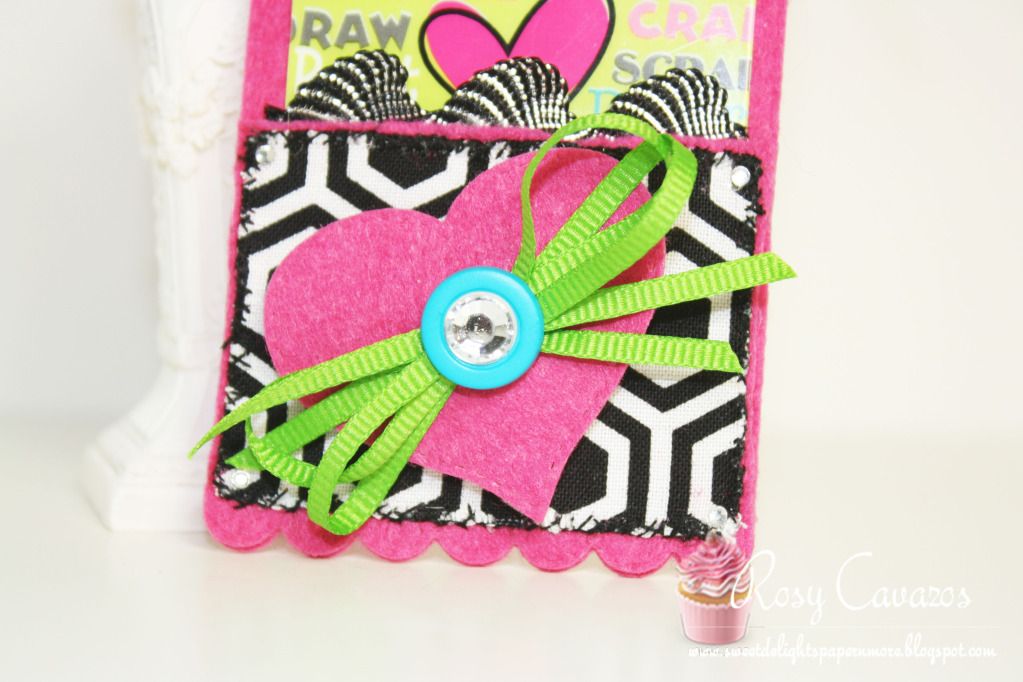
I cut two tags out of hot pink felt. Stiff felt makes a better more crisp cut. One of the tags was cut in half to create a pocket. I used clear glue to adhere the pocket part onto the tag.

A small rectangle scrap of fabric was sewn to the pocket. My Daughter wanted to practice her needle stitches technique. So, I let her stitch this rectangle versus using my sewing machine. Recently, Gamma taught her to use a thread and needle. Cut a hot pink heart from a My Creative Time Stitched Heart Die. Added ribbon, rickrack, button, and some bling for embellishments.


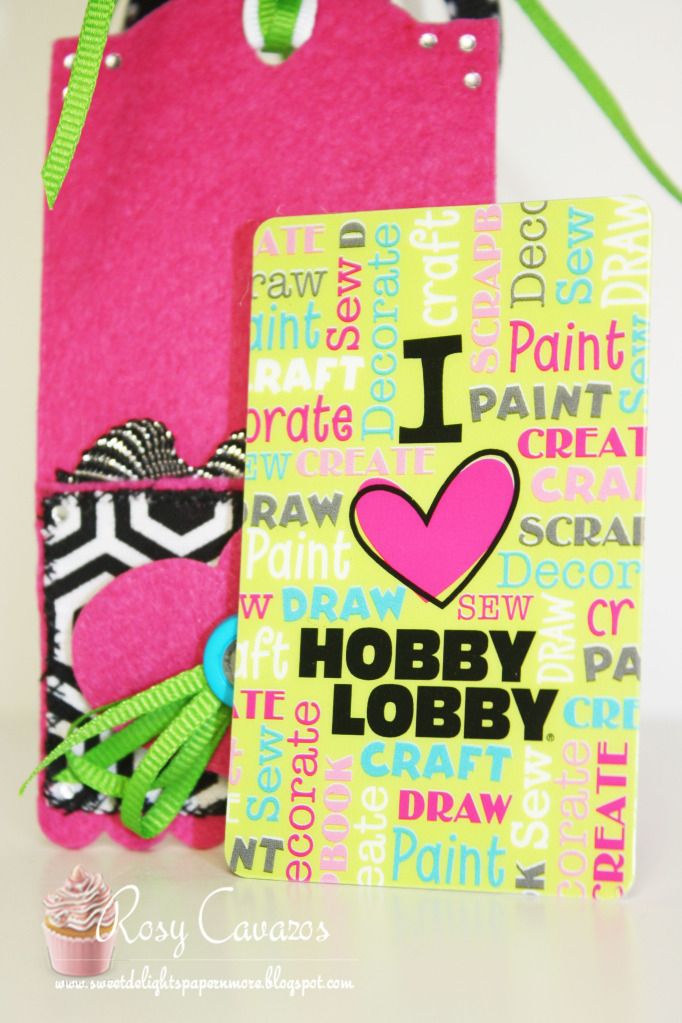
The color combo I chose came from this Giftcard.
My Creative Time Products Used:
I am thinking of creating more Giftcard Tags for Table Napkin Accents for Thanksgiving and inserting something sweet in the pocket. How about a Christmas Tree Giftcard Tag? Or a Teacher Giftcard Tag? The GiftCard Tag Theme has endless possibilities. I hope you were inspired to create something fun for this Challenge. I can't wait to see what you all come up with!
Dont Forget: 
For this Challenge, I want to incorporate Fabric and Stitches to our Projects. Any type of project goes. Meaning, you are welcome to create a Card, Layout, Home Decor, or 3-D Project. As long as you are using MY CREATIVE TIME PRODUCTS as well.
Thanks so much for stopping by! Also, PLEASE LEAVE A COMMENT. I would love to read what you thought of today's Challenge!

Now onto the AWESOME design team!

Miss Nikki

Miss Shar

I had so much fun making my tag! I totally missed crafting!;)
Here is what I used:
~Ribbon Papertrey Ink
~Twine & button - Liz Paper Loft Boutique

 VIDEO TIME!;)


LUCKY WINNER from the last challenge! Random.org chose:
#4 Kim Ogden


CONGRATS Miss Kim! Please email me your addy to info@my-creative-time.com. ALSO, please grab your Winning Badge code to the right of my blog & display it on your blog proudly my friend!


 Thank you SOOO much for visiting & I hope to see LOTS of you participating in the SUPER FUN challenge hosted by our very own 'Miss Rosie'!

Here is a re-cap of the challenge:
 ~ Make any project of YOUR choice using Fabric & Stitches
~ If you have My Creative Time products, we would LOVE to see them incorporated in your projects! If you don't own any yet, feel free to use what you have on hand!
~Link up your project HERE on this post to Mr. Linky below & leave a comment
~Deadline for this challenge is Tues, Nov 20th @ midnite

Have a FABULOUS day my sweet friends! xoxo

Wednesday, July 25, 2012

Guest Designers: Jeanne & Kim S.!

Good morning, My Creative Time fans! Jeanne here, from Jeanne's Paper Crafts, as a guest designer while Emma is away taking care of her family. Take care Emma...we got this! :)

On my card today, I am using one of My Creative Time's earlier stamp sets, 100% Sweetness. It is actually one of My Creative Time's Valentine sets, but hey...you can use these sentiments at any time!


The hexagon card base is a shape in the Silhouette Library. I duplicated the shape, flipped it and then welded the two of them together to create the base. It measures just under 5 1/2 inches in width, and a little less in height, but I don't recall the actual measurement. I cut it out in PaperTrey Ink Kraft cardstock. To create the top layer, I used the internal offset feature and cut it out in My Mind's Eye Rosy 6x6 paper stack.

I found this adorable Frog Prince SVG file designed by Lisa Norris over at Pretty Paper, Pretty Ribbons. Isn't he just the cutest?! He was cut out in Core'dinations cardstock. The pattern paper is also from the My Mind's Eye Rosy stack. It has some of the cutest papers in it! I really love all of the new papers from My Mind's Eye, it's quickly becoming one of my favorite paper companies. :)


Supplies:
PaperTrey Ink Kraft, White, and Vintage Cream cardstock
My Mind's Eye Rosy 6x6 paper stack
My Creative Time 100% Sweetness
Silhouette Studio Library (Hexagon)
Pretty Paper, Pretty Ribbons Frog Prince SVG file

Well, that's it from me today! Don't forget to stop back by tomorrow for another super cute My Creative Time project!  

And now, a project from Kim:

Hello, this is Kim Score from Paper Punch Addiction and I'm excited to be sharing this new technique with you while Emma takes some time off to care for her son.  Today I'm going to show you how to create what I call a "Showcase" card.  This is a modified easel card which has a popped out frame in front of it and another popped out element in front of the frame.  This technique can be modified in so many ways to showcase different kinds of elements.  For my card, I used the Fly Away With Me stamp set paired with the Fly Away With Me die and Fly Away With Me Sentiments.  The stamps and dies all coordinate beautifully!


Please visit my blog to download the step by step tutorial.  Thanks!

Monday, July 23, 2012

Guest Designer: Cassandra!

Hello everyone!  This is Cassandra from CREATING with COLOR by CASSANDRA, and I'm filling in for Emma today while she continues to spend time with her family during her son's recovery.  It's been several weeks since this whole thing started, and I can only imagine how difficult this has been for everyone in her family.  So I wanted to make another card for Emma to continue sending her lots of love and support and let her know just how much we all care.


This is a 6x6 card, which I think is a great size when you are creating a scene.  The card base is made with kraft colored cardstock from Recollections.  And I did some faux stitching along the borders of the card with a black ~ Zig Writer Pen.


This wonderful hot air balloon is made with the recently released MCT ~ Fly Away With Me stamp set and the MCT ~ Fly Away With Me Dies.  This super fun hot air balloon is perfect for paper piecing!  I used my favorite Doodlebug Designs ~ Petite Prints patterned paper.  The polka dots and the grid paper are the two different sides of the same sheet. The red accents on the balloon and the balloon basket are made with Recollections ~ cardstock.  For some dimension, I added pop dots behind the hot air balloon.


For the sentiments, I mixed two different stamp sets.  The "Sending you" is from the MCT ~ Fun Pockets stamp set. **It's actually just a portion of the full sentiment that says "Sending you a pocket full of."  I just taped off the words that I didn't want to use.  The "Love" is from the MCT ~ Floral Sentiments stamp set.  **Once again, it's only a portion of the full sentiment that says "With Love..." and I just taped off the parts I wasn't going to use.  The inks are black ~ Ranger Archival Ink and Ladybug Red ~ Memento Ink.


One of my favorite parts about this card (besides the hot air balloon of course) are the clouds.  These wonderful clouds are cut with the cloud dies in the MCT ~ Fly Away With Me Dies. There are two different sizes like you see here.  And they have Emma's wonderful signature stitching around the edges. LOVE IT!!!  The paper for the clouds is simple Georgia Pacific ~ white cardstock from Walmart.  I added some pop dots underneath the little cloud on the right for some extra dimension and to show a little movement in the scene.  The pretty blue with white polka dots patterned paper is from the Bella Blvd ~ Baby Boy collection.  


Another one of my favorite parts (ok, I just love the whole card...lol) are the little hearts.  I used the tiny little heart stamp from the MCT ~ Happy Mail stamp set.  I stamped them all with Ladybug Red ~ Memento ink and then cut them all out by hand and placed them randomly to look as if they are falling from the balloon basket.  The paper for the grassy hills is from the Coredinations ~ Vintage collection.  I used the old Creative Memories ~ Wavy Trimmer - which is just perfect for making mountains, hills and water.  I also added a little green chalk to the tops of the hills for a little extra dimension and definition.


Well, that's it for me.  I hope you liked my simple little card today.  Thanks for stopping by.  We will see you all again tomorrow.  And make sure to leave a comment full of love so that we can continue to support Emma through these last few weeks of Aaron's recovery.  He is such a little trooper!!!

Thursday, July 19, 2012

Guest Designer: Kim!

Happy Thursday everyone ~ it's Kim from Scrapin Mom Of One Inspiring Little Boy filling in for Emma while she continues to take care of her family! Sounds like Aaron is still heading in the right direction ~ so continue to pray that Emma and her family can put this ALL behind them real soon!

Starting tomorrow Emma is going to have a "Customer Appreciation Sale"! Yes ~ I said SALE! Save 20% with coupon code:: THANKU! This weekend only! Friday July 20, 2012 ~ July 22, 2012!

I hope to show you all how versatile Emma's products can be used. So for today's card I just had to share with you my rocket ship I created with the My Creative Time June Stamp release (click here) and some other MCT dies. It is VERY unconventional, but I just had this vision when I first saw the hot air balloon! During the release some of the hot air balloons that my fellow design team members created ~ whether it was  the paper they used or how they paper pieced ~ I could see this rocket ship! So I got this CRAZY idea to create one! So I stamped the hot air balloon image on this shiny silver paper. I cut out the middle section of the balloon including the the strings to the basket. Then I looked at my Pocket dies and thought those could be the wings ~ I used two of them. The banner dies could be the flames. But then I was a little stumped for the little window part until I realized the stitched circle die from the Build A Banner Kit would fit PERFECTLY! I know you are all thinking I am out there with this but I think it turned out rather CUTE! My son LOVED it! I tried to make this as masculine as I could minus the bling for stars. I am sending this to my sister's boyfriend who just had an AMAZING opportunity to work with a very well known company! I just want him to know "Reach for the sky ~ The sky is the limit!"

Have a GREAT day!


Materials Used:

My Creative Time ~ "Fly Away With Me" ~ hot air balloon
My Creative Time ~ "Fly Away With Me Sentiments" ~ sentiments and banner dies
My Creative Time ~ "Fun Pockets Stamp Set" ~ pocket dies
My Creative Time ~ "Build A Banner Kit" ~ stitched circle die
Paper ~ Paper Trey Ink, Bazzill & Bo Bunny
Stampin Up & Archival Ink
Recollections stars

Friday, July 13, 2012

Guest Designer: Liz!

Hi Paper Lovers!  This is Liz for Liz's Paper Loft and I'm thrilled to pieces to be a Guest Designer for My Creative Time again.  Especially since now that we know Emma's son Aaron is on the mend and getting stronger everyday!

Since Emma usually has her Friday Tip of the Day, I'm going to give a little tip.  For today's project I wanted to create a card using clear cardstock.  I have noticed that when trying to cut clear cardstock it doesn't alway cut all the way through.  Could be because my blade needs to be replaced.  But I have a simple fix, just cut it out twice, using multi cut function.  Now I know this seems like a no brainer, however, sometimes even those that are experienced forget the simple stuff!  :)


Go to my blog for the complete recipe!

Even though baby Aaron is getting stronger daily, please keep him and the whole family in your prayers!

Enjoy!

Related Posts with Thumbnails